Tagify — Tags as a Service
A SaaS I built that auto-generates keyword tags from any webpage's content — drop in a JS snippet and any wiki or blog gets discoverable, clickable tags.
Tagify is a tool I built that helps organize and discover web content automatically. It processes a page’s content and returns the most relevant keyword-tags — “Tags-as-a-Service.”
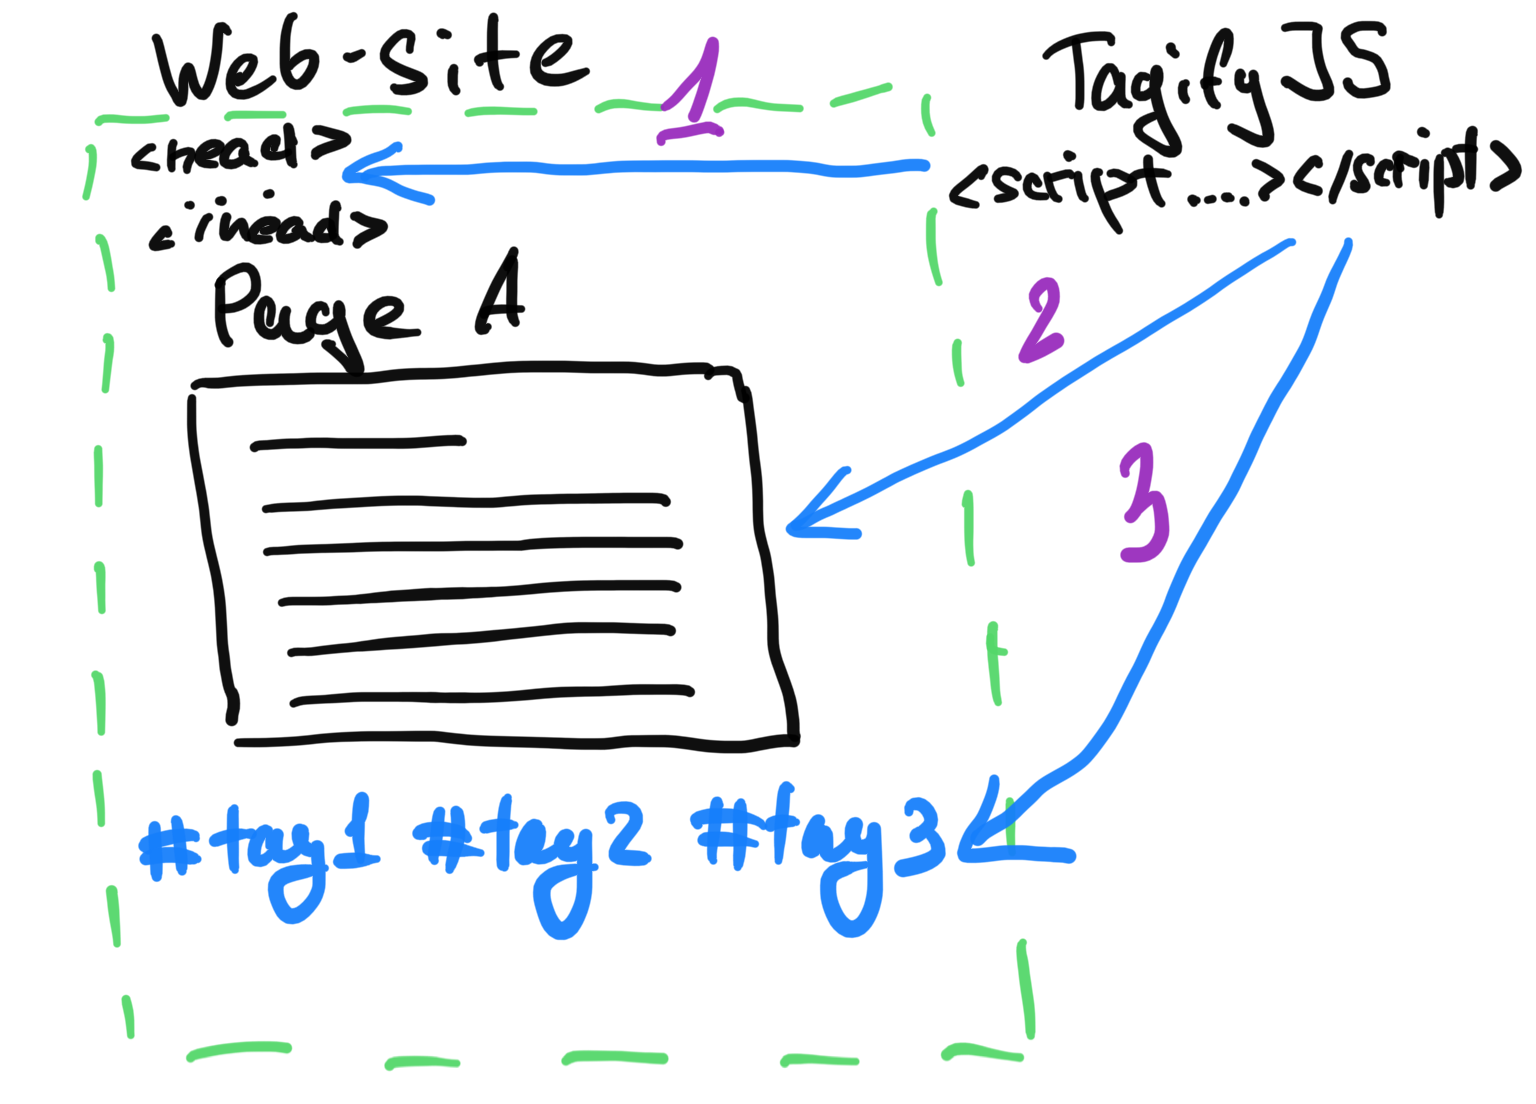
A wiki or blog with hundreds of pages can drop in a single JavaScript include and get auto-generated, clickable tags for every page. Clicking a tag surfaces other pages tagged the same way — improving navigation and discovery with almost zero integration effort.
Status: past project, still live. Source on GitHub: zoomio/tagify · @zoomio/tagifyjs
Try it
Paste a URL and Tagify will pull out the most relevant tags, plus a page screenshot.
Setup at a glance
- Drop the library into
<head>:<script type="text/javascript" src="https://www.zoomio.org/tagifyjs/tagify.js"></script> - Pick a page to tagify.
- Display the generated tags into a target DOM element.
Full integration guide
The original 7-step guide, preserved.
1. Sign in
Click the “Log in” button at the top-right of the Tagify site.
2. Register a web-site
Under the “Tagify” dropdown in the top menu, open “Register site.” Enter the address of the site you want to tagify and click “Register.” You’ll get a unique site ID — copy and save it, you’ll need it in step 4.
3. Get the site ID
Keep the ID that was shown on the Register page — it identifies your site to the Tagify service.
4. Add TagifyJS to your site
Insert this into the <head> of the registered site:
<script type="text/javascript" src="https://www.zoomio.org/tagifyjs/tagify.js"></script>
5a. Mark pages in a list
Use the TagifyJS API to generate tags for selected pages and place the script after the HTML element that should contain the generated keywords.
5b. Mark an individual page
Place the script under (after) the target container where you want the generated tags to appear, on the page that displays the full article body.
6. Display relevant pages for a tag
Provide a page that shows related content for a given tag. Add the script under (after) the HTML element that should contain the list of relevant pages.
7. Bonus — inline tag editing for admins
To edit generated tags inline you need to authenticate first. Use Tagify’s “Log in” button — place the login-button script under (after) your chosen container. Once authenticated, edit icons appear next to each tag so you can add or delete them.
Deep dives
I wrote several posts about Tagify’s architecture and implementation while building it:
- Tags as a Service — the core idea
- How to Tagify — the integration walkthrough
- Integrating Tagify on a web-site — detailed setup
- Faster Stronger Better — performance work
- Support for more languages in Tagify — multi-language support
- Human-readable URLs — URL design decisions